


Ubuntu16 Linux Install Apache, MySql, PHP & phpMyAdmin
Disini bisa paham cara install Apache, MySql, PHP & phpMyAdmin pada Ubuntu.
1. First Update Sever
apt-get update
2. Install Apache2
apt-get install apache2
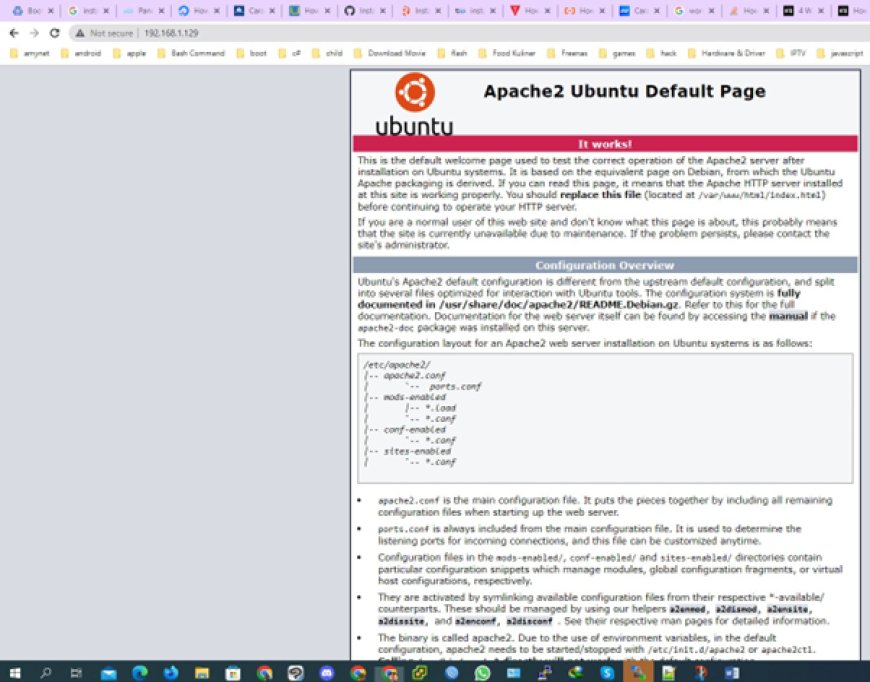
---Test your server by entering your ip on browser
You can check whether Apache has been installed by typing in the IP address of your server http://your-ip-address (or http://localhost if you're doing it on a local server). You should see a page like this :
3. Install mysql
apt-get install mysql-server
You will also be asked to enter the desired password of the MySql root account. Although it is optional, don't leave it. The default password of the root account is blank, and instead of changing it later on, better do it now.
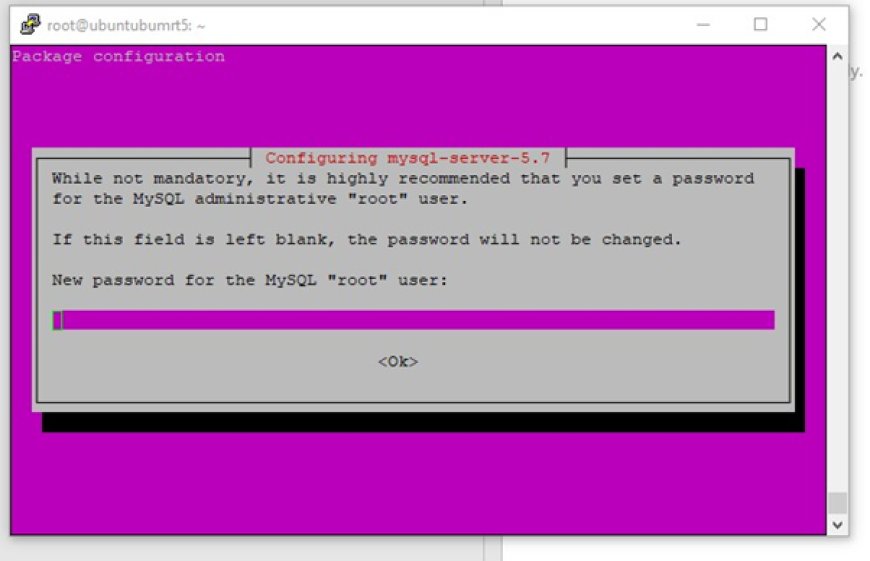
Type in a strong password and press the arrow-down button to highlight the Ok button. When highlighted the Ok button will turn red. Press the enter key to proceed.
You will also be asked for a confirmation of the password. Repeat the same.
Checking Successful Installation of MySql
Type the following command :
mysql -u root -p
If MySql has been installed successfully, you should be prompted for a password. Enter the password which you chose in the above step. You should see the MySql prompt like this :
mysql>
Here you can run mysql queries, create tables etc.
Now to go back, exit MySql by typing in the command :
exit
4. Install php
apt-get install php libapache2-mod-php php-mysql php-curl php-gd php-json php-mcrypt php-zip
Type the following command :
echo "" | sudo tee /var/www/html/phpinfo.php
sudo apt-get install php libapache2-mod-php php-mcrypt php-mysql
This will create a phpinfo.php file in the root directory. Type this url in the browser http://your-ip-address/phpinfo.php (or http://localhost/phpinfo.php if installing locally). You should see a page like this, showing your PHP configuration :

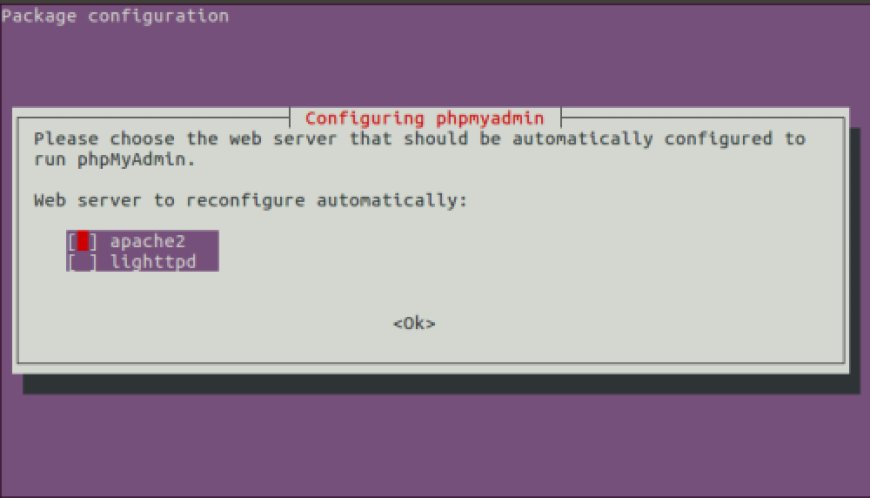
5. Intall phpmyadmin
apt-get install phpmyadmin
You will be asked to choose the type of web server. The default choice would be apache2. Press space key to select. Now press Tab key to highlight the Ok button. Now press the enter key. Pressing key in this order is very important, otherwise apache2 will not be selected. When selected apache2 would have a * symbol beside it, see the second image how it would look like.
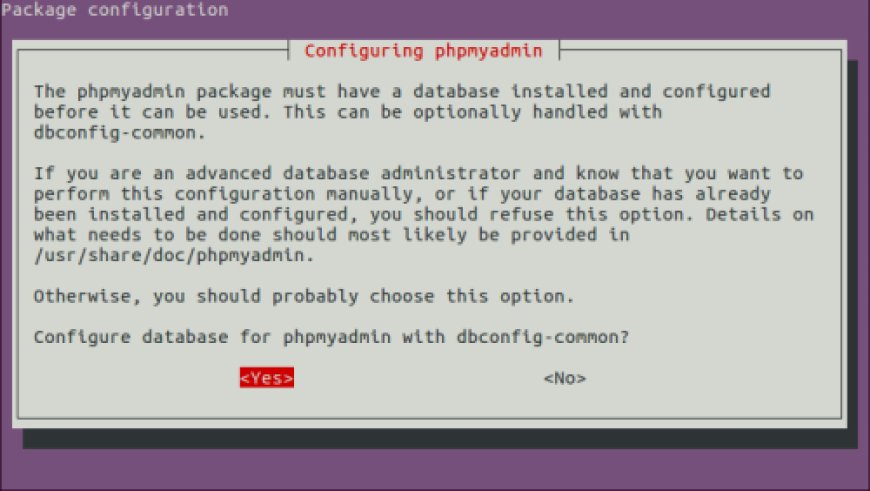
You will then be asked whether to configure database for phpmyadmin with dbconfig-common. Choose Yes and click enter.
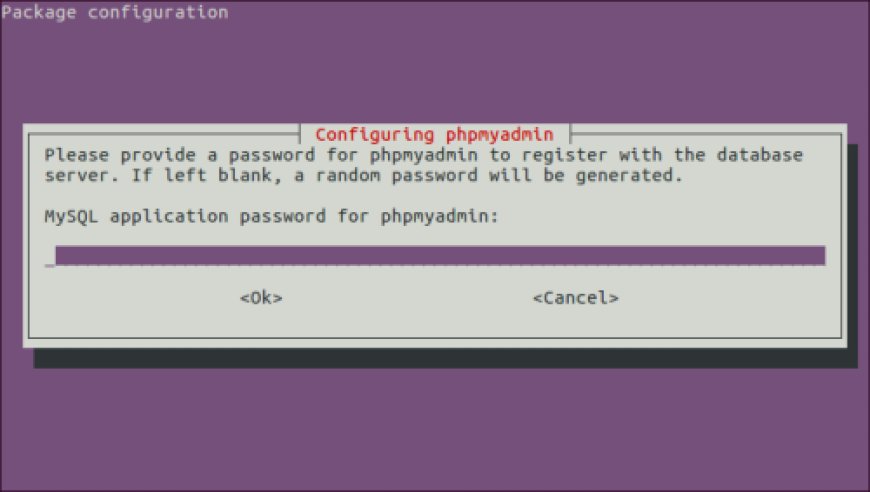
You will then be asked to enter the password of MySql root account. Enter the password which you typed while installing MySql. Use the Tab key to highlight the Ok button and press enter.
Do the same when asked for password confirmation.
The latest available version of phpMyAdmin will be installed.
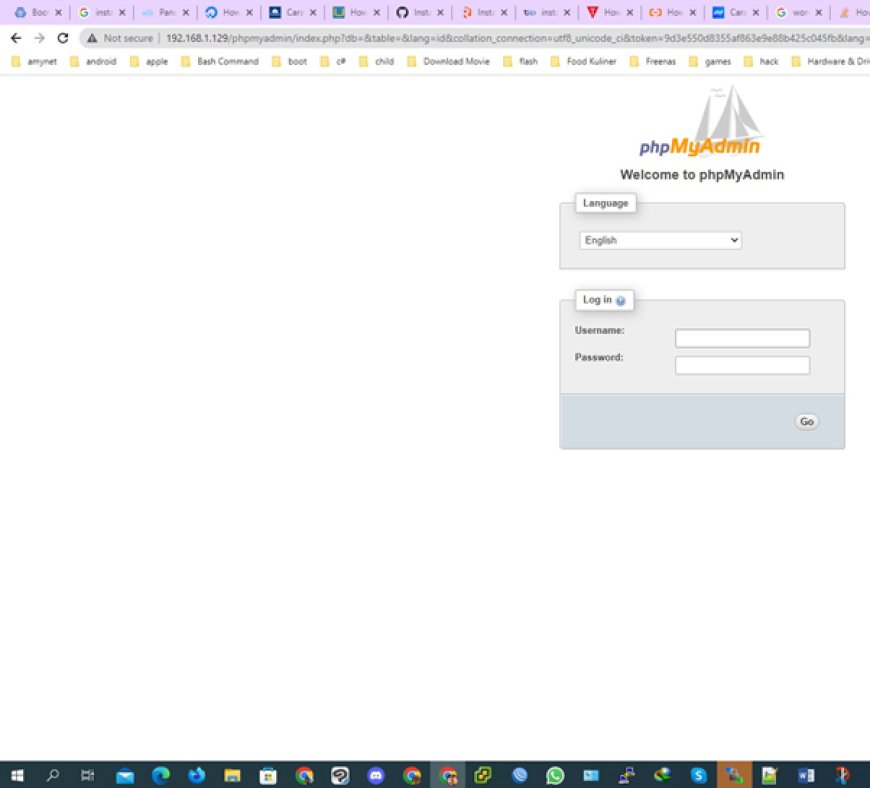
Checking Successful Installation of phpMyAdmin
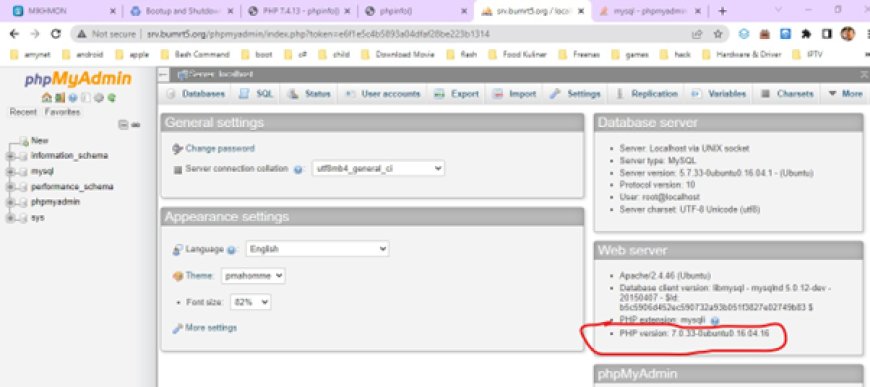
Visit the url http://your-ip-address/phpmyadmin (or http://localhost/phpmyadmin) in your browser. If phpMyAdmin is installed successfully, you should see the standard phpMyAdmin login page. Type in root as the username, and the MySql password you chose earlier to access the databases.
Change your upload settings in php.ini configuration file where your current php use for phpmyadmin
Change the below settings to these values, Change to
post_max_size = 750M
upload_max_filesize = 750M
6. Restart server
shutdown -r now
Setting virtual host apache ubuntu
mkdir -p /var/www/mikhmon
chmod -R 755 /var/www/mikhmon
chown -R www-data:www-data /var/www/mikhmon
Silahkan anda copy semua file difolder mikhmon tersebut di folder /var/www/mikhmon
Kemudian
cp /etc/apache2/sites-available/000-default.conf /etc/apache2/sites-available/mikhmon.bumrt5.conf
edit file /etc/apache2/sites-available/mikhmon.bumrt5.conf
by winscp with this code.
ServerName mikhmon.bumrt5.org
ServerAlias www.mikhmon.bumrt5.org
ServerAdmin webmaster@localhost
DocumentRoot /var/www/mikhmon
ErrorLog ${APACHE_LOG_DIR}/error.log
CustomLog ${APACHE_LOG_DIR}/access.log combined
</VirtualHost>
Kemudian aktifkan file dengan alat a2ensite:
a2ensite mikhmon.bumrt5.conf
Nonaktifkan situs default yang ditentukan di 000-default.conf:
a2dissite 000-default.conf
restart apahe
service apache2 restart
How To Run Multiple PHP Versions on One Server Using Apache and PHP-FPM
Step 1 — Installing PHP Versions 7.0 and 7.4 with PHP-FPM
sudo apt-get install software-properties-common -y
sudo add-apt-repository ppa:ondrej/php
sudo apt-get update -y
sudo apt-get install php7.0 php7.0-mbstring php7.0-gettext php7.0-curl php7.0-intl php7.0-fpm php7.0-mysql libapache2-mod-php7.0 libapache2-mod-fcgid -y
edit file by winscp - > /etc/php/7.0/apache2/php.ini and file /etc/php/7.4/fpm/php.ini to enable module
extension=php_bz2.dll
extension=php_curl.dll
extension=php_fileinfo.dll
extension=php_gd2.dll
extension=php_gettext.dll
;extension=php_gmp.dll
extension=php_intl.dll
;extension=php_imap.dll
;extension=php_interbase.dll
;extension=php_ldap.dll
extension=php_mbstring.dll
extension=php_exif.dll ; Must be after mbstring as it depends on it
extension=php_mysql.dll
extension=php_mysqli.dll
;extension=php_oci8_12c.dll ; Use with Oracle Database 12c Instant Client
;extension=php_openssl.dll
;extension=php_pdo_firebird.dll
extension=php_pdo_mysql.dll
;extension=php_pdo_oci.dll
;extension=php_pdo_odbc.dll
;extension=php_pdo_pgsql.dll
extension=php_pdo_sqlite.dll
;extension=php_pgsql.dll
;extension=php_shmop.dll
sudo systemctl start php7.0-fpm
sudo systemctl status php7.0-fpm
sudo add-apt-repository ppa:jczaplicki/xenial-php74-temp
sudo apt-get update -y
apt install php7.4 php7.4-curl php7.4-intl php7.4-fpm php7.4-mysql php7.4-mbstring php7.4-gettext libapache2-mod-php7.4
systemctl start php7.4-fpm
systemctl status php7.4-fpm
a2enmod actions fcgid alias proxy_fcgi
systemctl restart apache2
Step 2 — Creating Directory Structures for Both Websites
sudo mkdir /var/www/disiniaja
sudo mkdir /var/www/web
sudo chown -R www-data:www-data /var/www/disiniaja
sudo chown -R www-data:www-data /var/www/web
sudo chmod -R 755 /var/www/disiniaja
sudo chmod -R 755 /var/www/web
echo "" | sudo tee /var/www/disiniaja/phpinfo.php
sudo cp /var/www/disiniaja/phpinfo.php /var/www/web/info.php
Step 3 — Configuring Apache for Both Websites
cp /etc/apache2/sites-available/000-default.conf /etc/apache2/sites-available/disiniaja.bumrt5.conf
edit file /etc/apache2/sites-available/disiniaja.bumrt5.conf
by winscp with this code.
ServerName disiniaja.bumrt5.org
ServerAlias www.disiniaja.bumrt5.org
ServerAdmin webmaster@localhost
DocumentRoot /var/www/disiniaja
DirectoryIndex index.php index.html
disiniaja>
Options Indexes FollowSymLinks MultiViews
Require all granted
AllowOverride All
Order allow,deny
allow from all
SetHandler "proxy:unix:/run/php/php7.4-fpm.sock|fcgi://localhost"
ErrorLog ${APACHE_LOG_DIR}/disiniaja.bumrt5.org_error.log
CustomLog ${APACHE_LOG_DIR}/disiniaja.bumrt5.org_access.log combined
cp /etc/apache2/sites-available/000-default.conf /etc/apache2/sites-available/web.bumrt5.conf
edit file /etc/apache2/sites-available/web.bumrt5.conf
by winscp with this code.
ServerName web.bumrt5.org
ServerAlias www.web.bumrt5.org
ServerAdmin webmaster@localhost
DocumentRoot /var/www/web
DirectoryIndex index.php index.html
web>
Options Indexes FollowSymLinks MultiViews
Require all granted
AllowOverride All
Order allow,deny
allow from all
SetHandler "proxy:unix:/run/php/php7.0-fpm.sock|fcgi://localhost"
ErrorLog ${APACHE_LOG_DIR}/web.bumrt5.org_error.log
CustomLog ${APACHE_LOG_DIR}/web.bumrt5.org_access.log combined
Save and close the file when you are finished. Then check the Apache configuration file for any syntax errors:
sudo apachectl configtest
Next, enable both virtual host configuration files:
sudo a2ensite disiniaja.bumrt5.conf
sudo a2ensite site2.your_domain.conf
Now disable the default site, since you won’t need it.:
sudo a2dissite 000-default.conf
sudo systemctl restart apache2
Step 4 — Testing Both Websites
Open your web browser and visit both sites http://disiniaja.bumrt5.org/phpinfo.php and http://web.bumrt5.org/phpinfo.php
Fix for PHPmyadmin
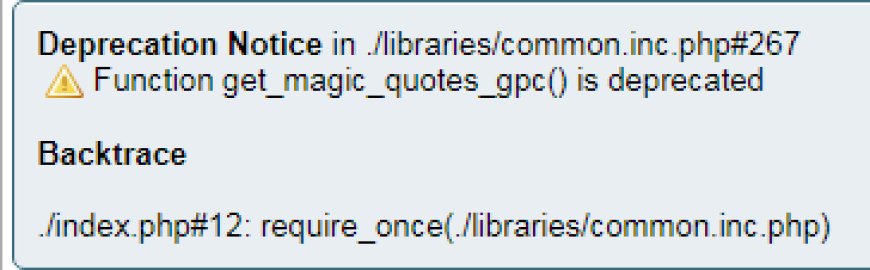
The simplest solution is to download the latest version (at the time of writing this note - 5.0.4) from https://www.phpmyadmin.net/ and copy the files to /usr/share/phpmyadmin. First, remove everything from this directory. Then reboot
What's Your Reaction?