


PFsense on VMWare Esxi basic setup
Mau paham tentang PFsense on VMWare Esxi basic setup, hanya disiniaja
PFsense on VMWare Esxi basic setup
1. Download iso file from https://www.pfsense.org/download/

2. Upload iso file to datastore on ESxi

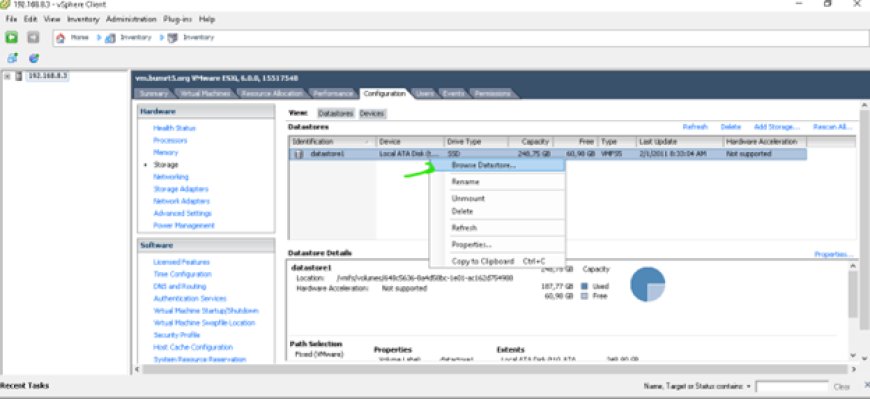
Create new folder for source, in this case i have name master then upload iso file to new directori

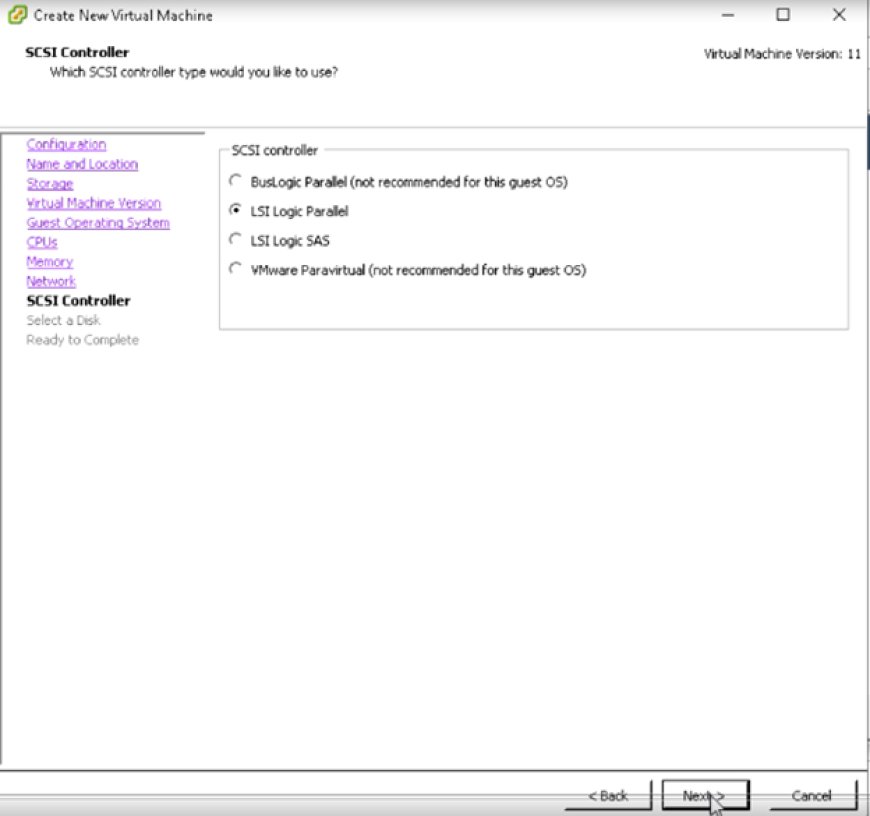
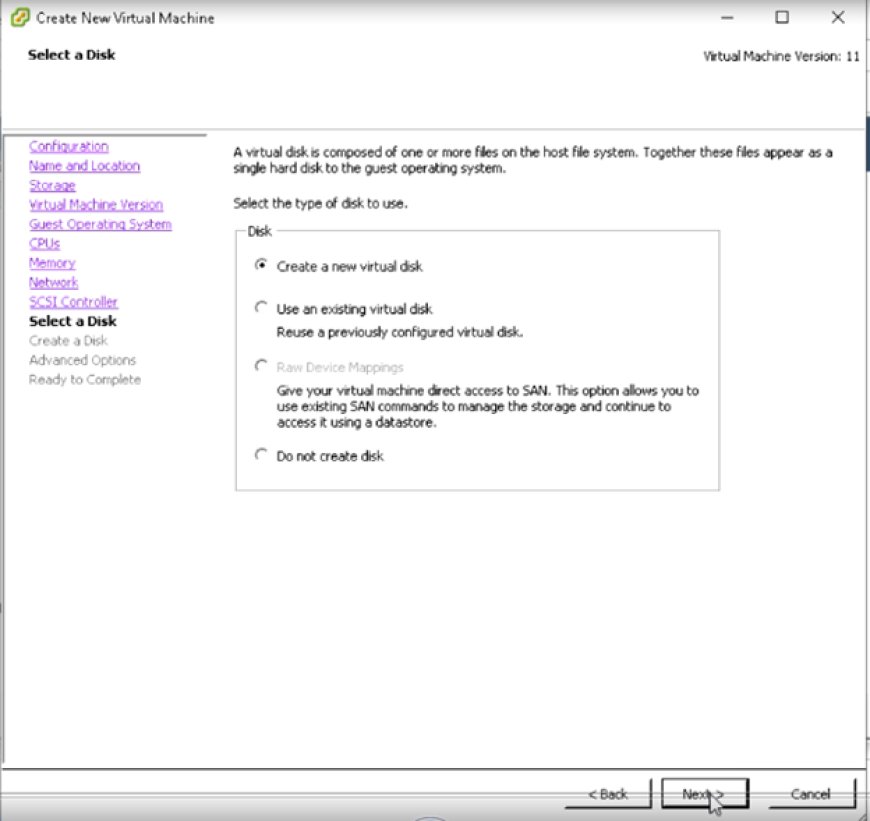
3. Create New Virtual Machine Host


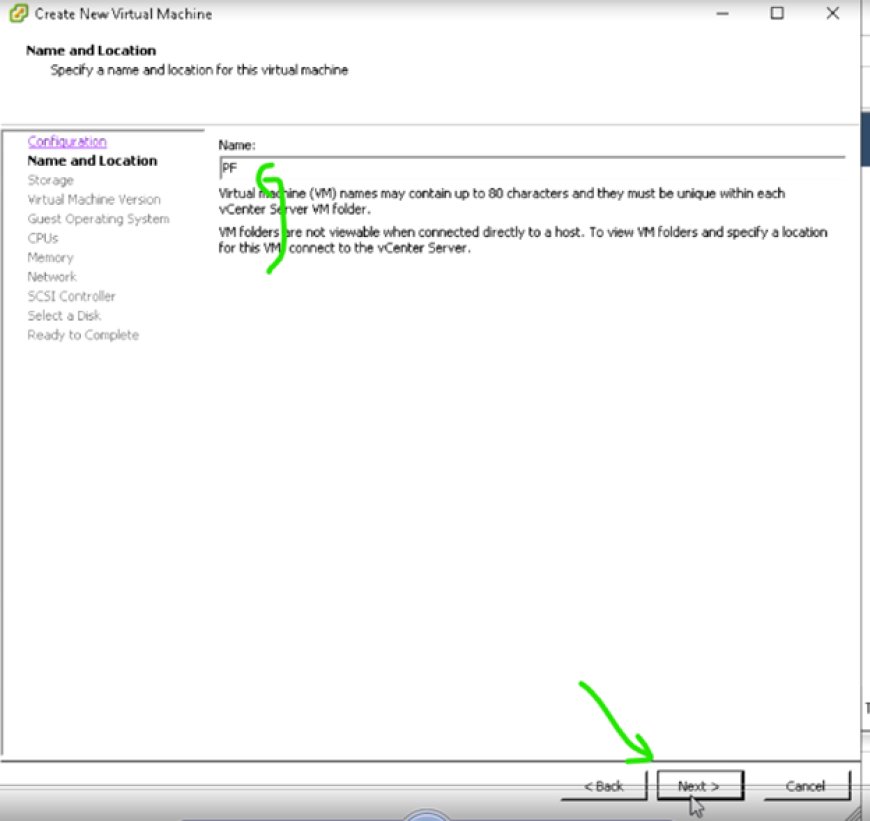


For best performance running 64 BIt, set RAM up to 4GB

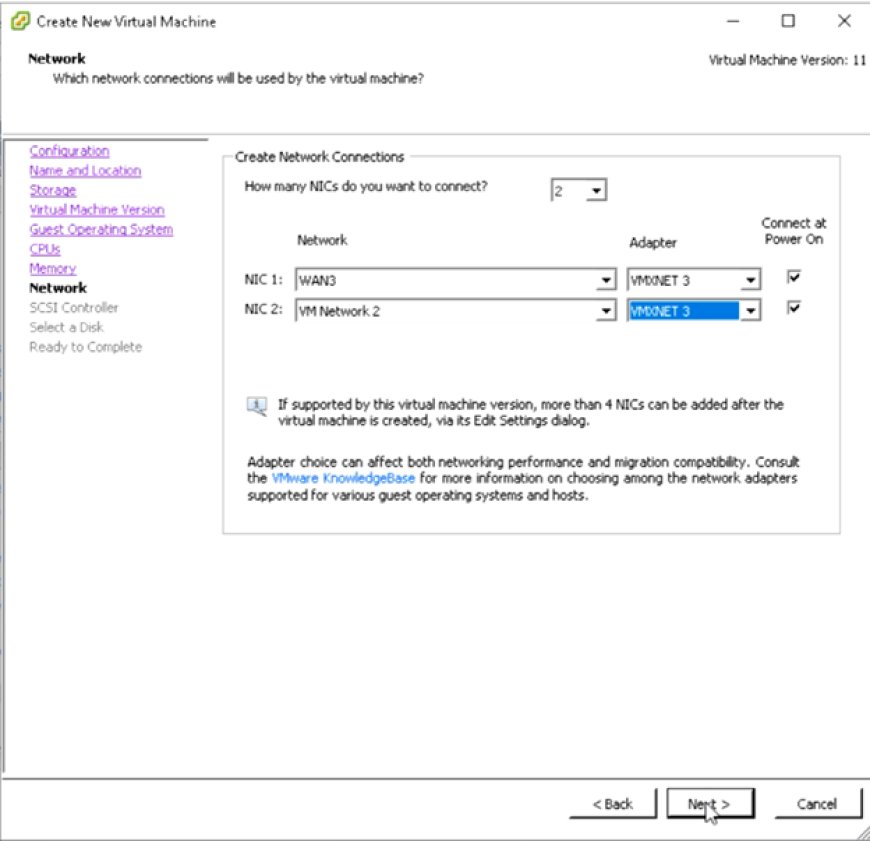
Set Adapter WAN & LAN to VMXNET for 10 GB interface

Edit VM Host Hardware not used

Delete Floppy Disk

Add iso image from datastore
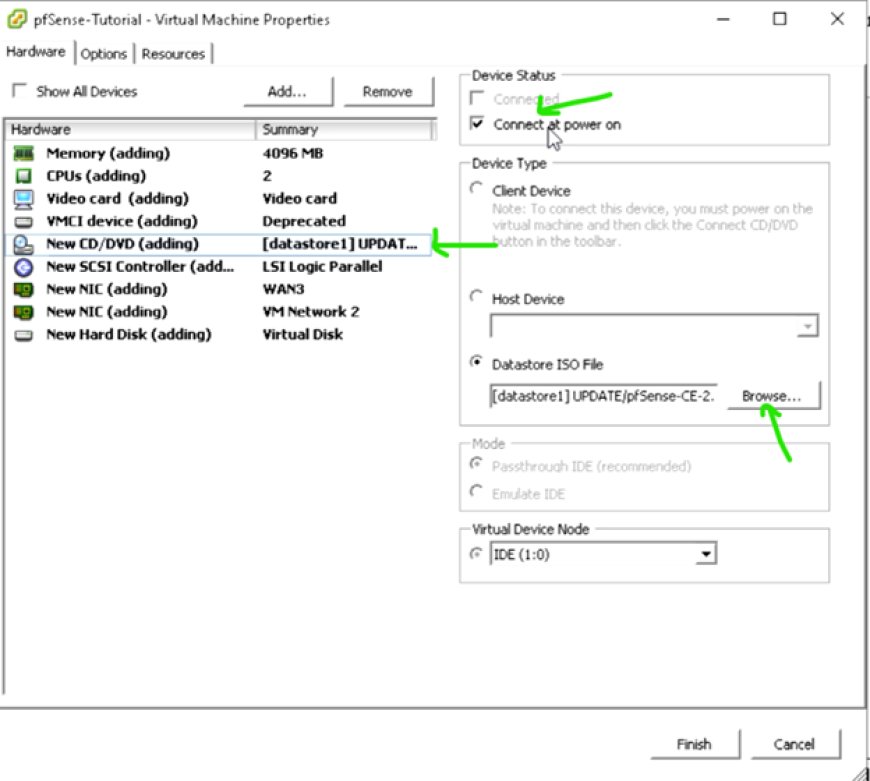
OK, Now FINISH TO CONFIGURATION New Virtual Machine Host
4. Running New Virtual Machine Host


5. Installation Process


For optimal performance set partition disk to ZFS


OK, finish for this step, then reboot
Set No to interfaces VLANs

Set WAN & LAN, Don't be wrong. Set match exactly MAC ADDRESS with your interfaces on VM Host Interfaces.

Set WAN Interface

Set LAN Interface


Then halt the system, for remove CD/DVD Drive

Remove CD/DVD Drive not used

Take Virtual Machine Snapshot to Backup New PFsense Host
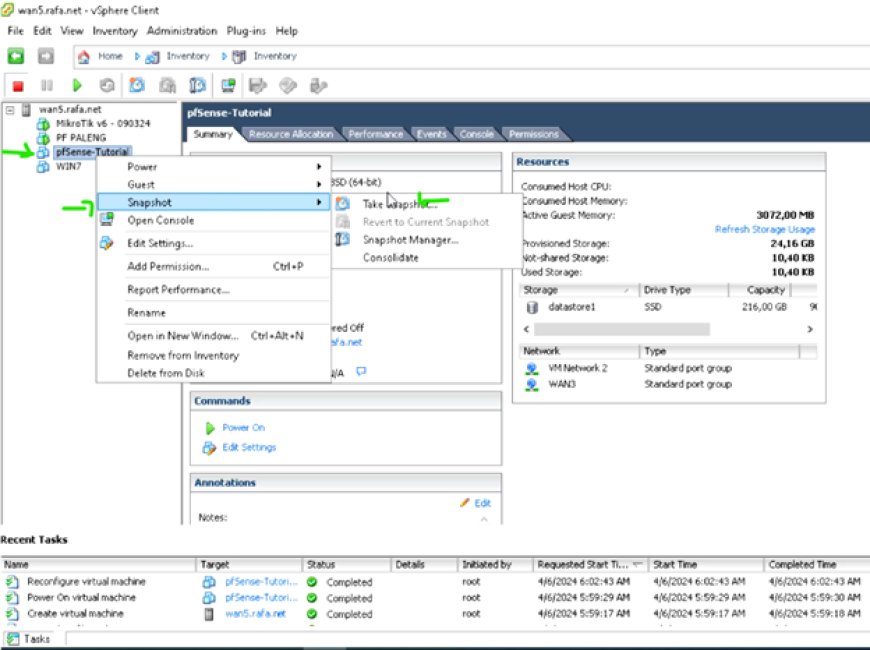

Running VM PFsense Host
6. Setup LAN IP


For LAN set None IPv4 and IPv6 Upstream gateway
Setting DHCP Server on LAN


Then Reboot PFsense

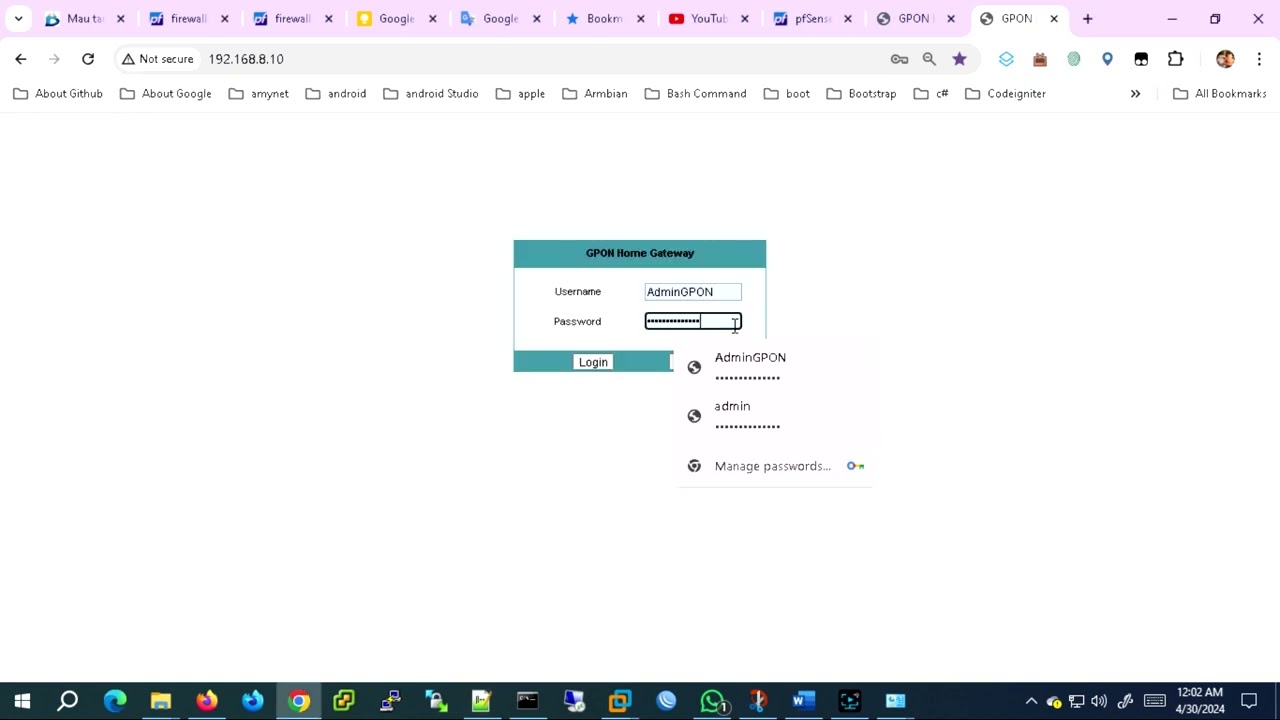
7. Open browser by PC with same PFsense network
Username : admin
Password : pfsense

8. Setup general information By Wizard

Setup DNS Server to cloudflare and Quad9

9. Time Server Information

10. Configure WAN Interface

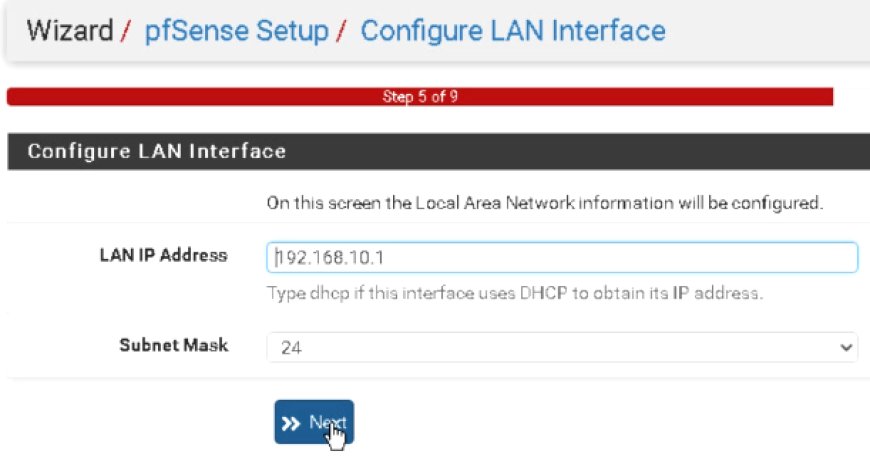
11. Configure LAN Interface
12. Set Admin WebGUI Password

Then reload configuration, OK NOW FINISH for WIZARD CONFIGURATIONS
13. Configure System > Advanced
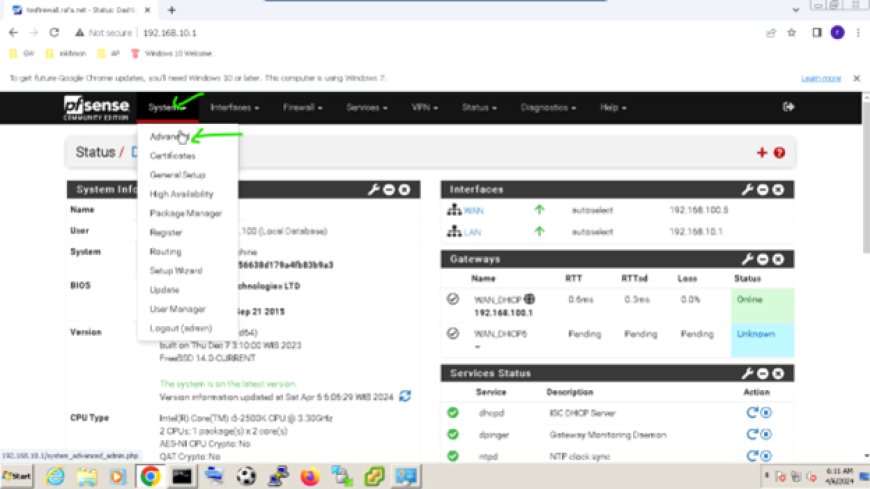
Set to Cstom Port For WebGUI and SSH Port

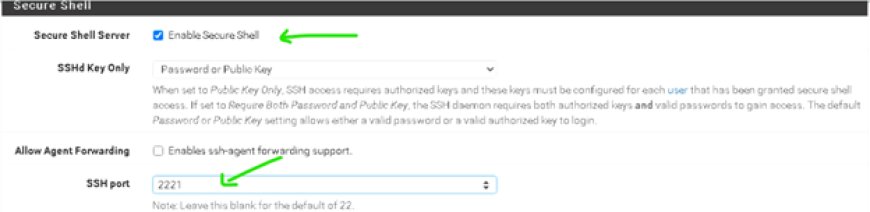
Then SAVE CONFIGURATION

14. Configure System > General Setup
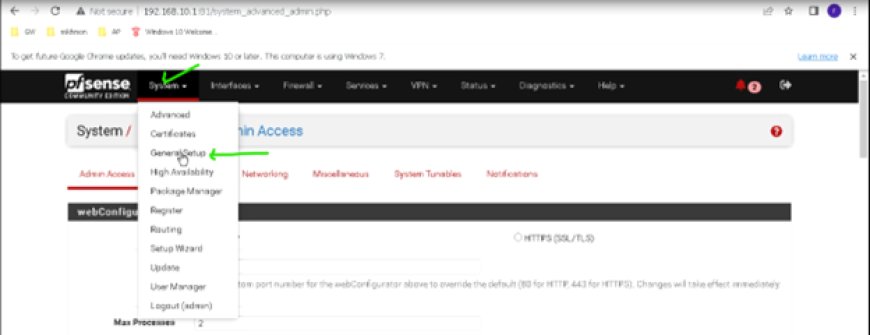
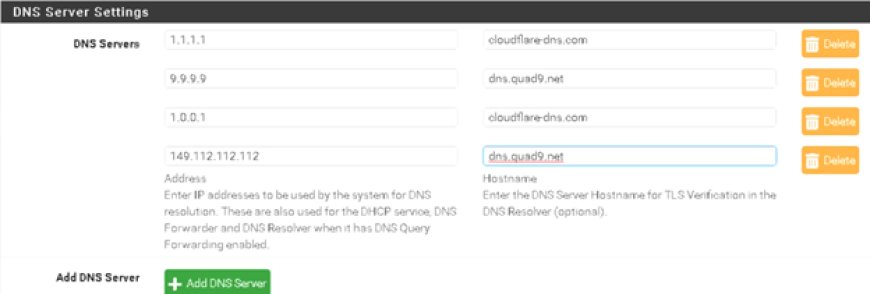
SAVE CONFIGURATIONS
15. Configure Interfaces > WAN
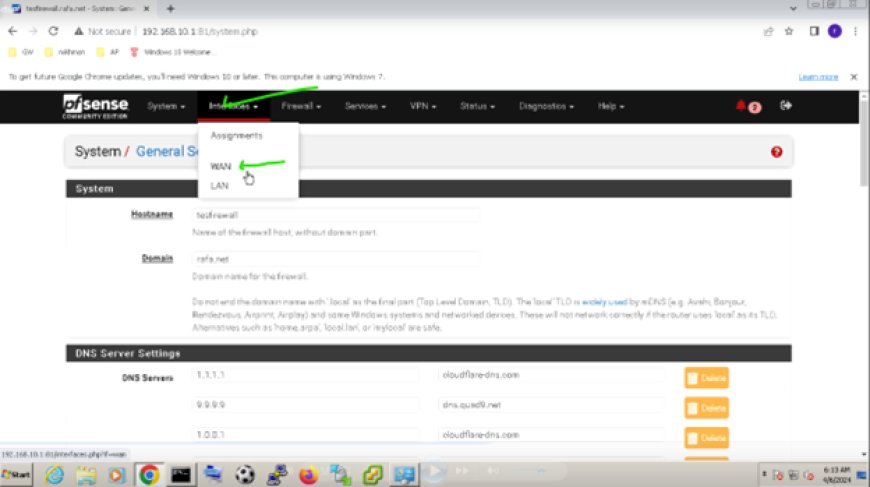

SAVE & APPLY CHANGES
16. Configure Sevices > DHCP Server

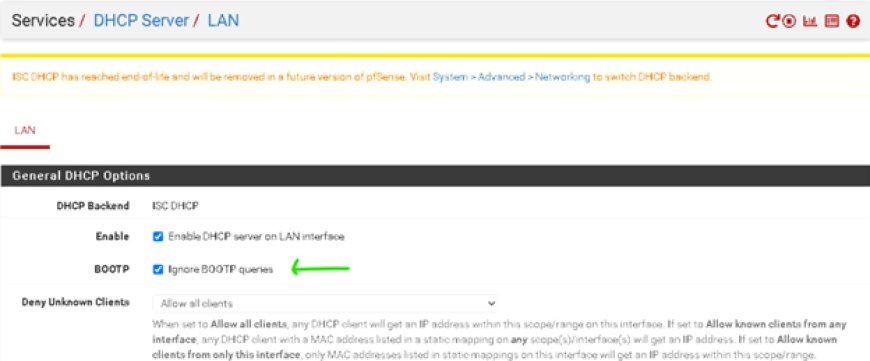
SAVE & APPLY CHANGES
17. Configure System > Advanced > Networking
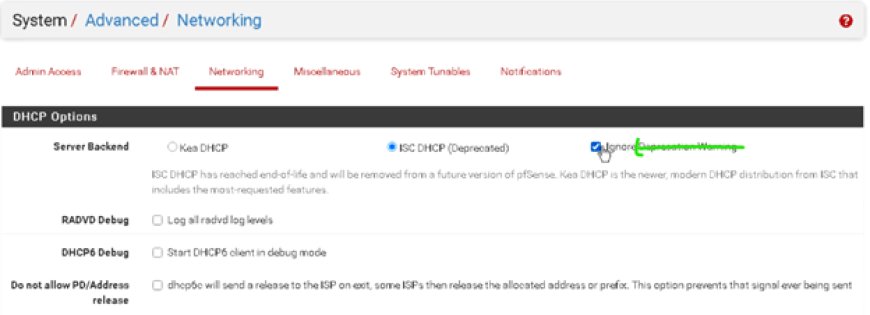
SAVE CONFIGURATION
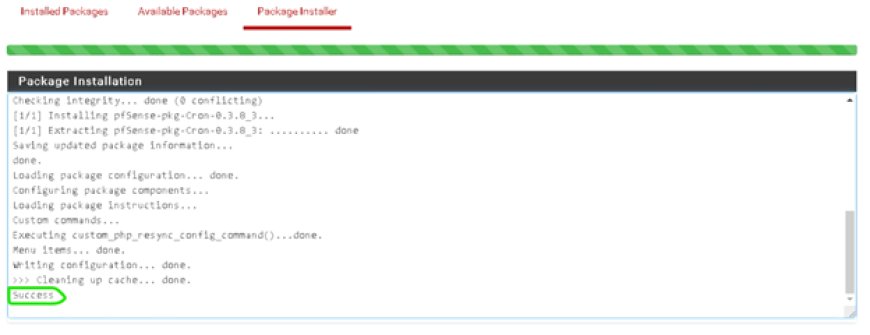
18. Configure System > Package Manager

INSTALL CRON & Open-VM-Tools


19. Configure Services > DNS Resolver
Copy this:
server:
private-domain: "afqar.net"
do-tcp: yes
minimal-responses: yes
prefetch: yes
qname-minimisation: yes
rrset-roundrobin: yes
forward-zone:
name: "."
forward-ssl-upstream: yes
forward-addr: 1.1.1.1@853
forward-addr: 1.0.0.1@853
forward-addr: 2606:4700:4700::1111@853
forward-addr: 2606:4700:4700::1001@853
forward-addr: 9.9.9.9@853
forward-addr: 149.112.112.112@853
forward-addr: 2620:fe::fe@853


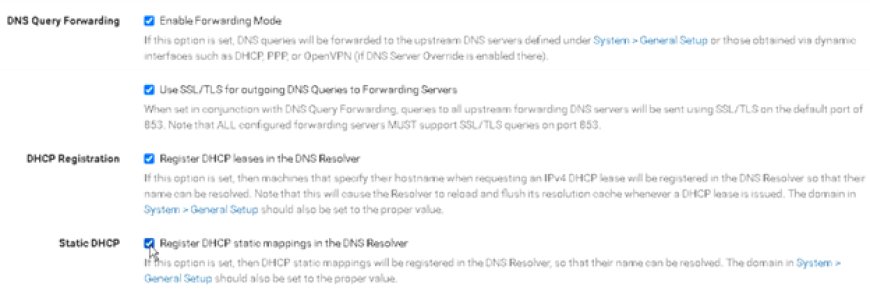

SAVE & Apply Changes
Configure Service > DNS resolver > Advanced Setting

20. Configure Firewall > Rules


Apply Changes
Reboot PFsense

21. TES ALL YOUR CONFIGURATION. FINISH
You can watch this lesson on YouTube to understand better. Don't forget to help our channel to develope further so that, there is nothing that can't be done except https://disiniaja.id.
What's Your Reaction?